
CRAFTOLOGY BY NANCY
Hi, I'm Nancy.
I'm a crafter, illustrator, and mom who loves turning ideas into something handmade.
Here you'll find my favorite tools, downloadable designs, and creative projects — all documented from a place of curiosity, trial and error, and love.
Blogs
COSTUMES
HOLIDAYS
THEMED PARTIES
CUSTOM ATTIRE
Want to chat or collaborate?
You can always reach out via Instagram or email me directly. I love connecting with fellow makers and moms.
© 2025 Craftology by Nancy. All Rights Reserved. | All content is protected under copyright law.

CRAFTOLOGY BY NANCY
Creative goods for families, kids, and collectors
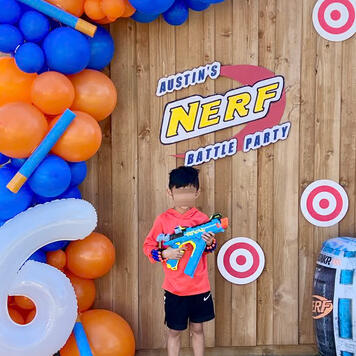
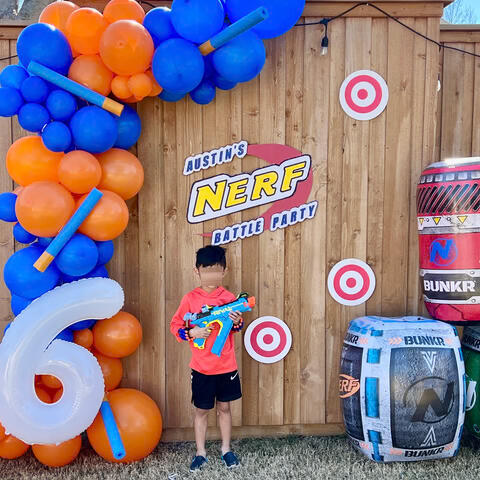
NERF Battle Party
December 4, 2024
> This page includes affiliate links. If you purchase something through them, I may earn a small commission at no extra cost to you — but I only share products I genuinely use and recommend!
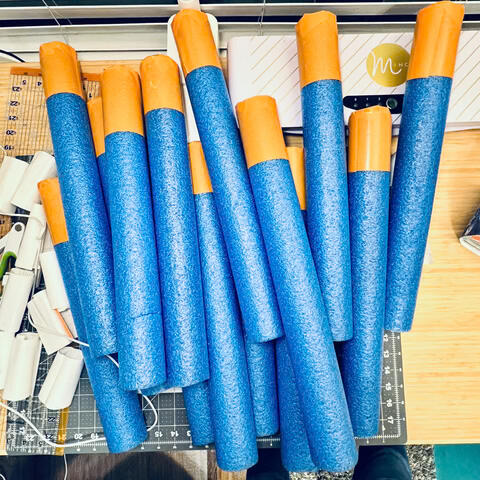
DIY GIANT NERF DARTS TUTORIAL
Make your kid’s birthday party extra special with these giant DIY Nerf darts! They’re super easy to make, fun to play with, and can even double as party decorations. Here’s how I made them for my son’s birthday.
Materials:
Pool noodles - I used blue, but you can pick any color: orange, neon green, white, etc.
Orange book cover material - Found at Dollar Tree, but you can use alternatives like felt fabric, colored paper, painter's tape, or regular fabric.
Cutting mat - Optional, but handy for clean cuts.
Rotary cutter or scissors
Steps:
Cut the Pool Noodles: Divide each pool noodle into thirds. One pool noodle makes three darts, so for 15 darts, I used five noodles.
Prepare the Covering Material: Cut the orange book cover into 5” x 8” rectangular strips. These will wrap around each dart’s perimeter. Cut additional pieces into 4” squares. These will cover one end of each pool noodle.
Attach the End Covers: Peel the backing off a 4” square piece. Stick it firmly to one end of a pool noodle section. Press down the excess material onto the sides of the noodle.
Wrap the Perimeter: Peel the backing off a rectangular strip. Wrap it around the sides of the dart, overlapping the excess material from the square piece. Press firmly all around to ensure it sticks.
Reinforce (Optional): If you want extra durability, secure the edges with clear tape.
Tips and Tricks:
Mix and match colors for variety! You can use contrasting materials to give the darts a custom look.
Use these darts to decorate a balloon arch or scatter them around the yard for kids to play with.
For extra fun, set up a simple obstacle course or target practice game using these darts.
This project was a hit at the party! The kids loved playing with the darts, and they added a unique, playful touch to the decorations. Plus, they’re budget-friendly and customizable to fit your theme.
ULTIMATE DIY NERF PARTY FAVOR BAGS + SUPPLIES FOR THE PERFECT BATTLE!
Take your party to the next level with these custom-designed drawstring backpacks and all the battle essentials. Here’s how I put everything together to create an unforgettable experience for the kids.
DIY PARTY FAVOR: CUSTOM DRAWSTRING BACKPACKS
Materials:
Orange drawstring bags
Heat transfer vinyl (white, glow-in-the-dark)
Heat press (newer version) or iron
Steps:
Design the Artwork: I drew a fun NERF-inspired design tailored to the party theme.
Cut the Vinyl: Using my cutting machine, I cut the design out of white, glow-in-the-dark heat transfer vinyl.
Transfer the Design: With a heat press, I ironed the design onto each backpack, following the recommended heat guide.
Each backpack was not just a favor—it became part of the party experience!
Want to chat or collaborate?
You can always reach out via Instagram or email me directly. I love connecting with fellow makers and moms.
© 2025 Craftology by Nancy. All Rights Reserved. | All content is protected under copyright law.

CRAFTOLOGY BY NANCY
Creative goods for families, kids, and collectors
Easy DIY Floral Ornaments Tutorial
December 4, 2024
> This page includes affiliate links. If you purchase something through them, I may earn a small commission at no extra cost to you — but I only share products I genuinely use and recommend!

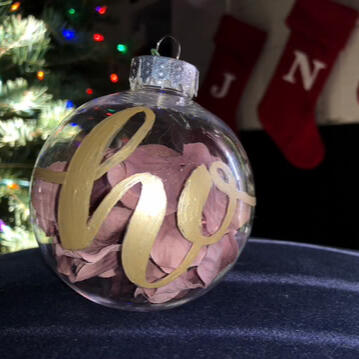
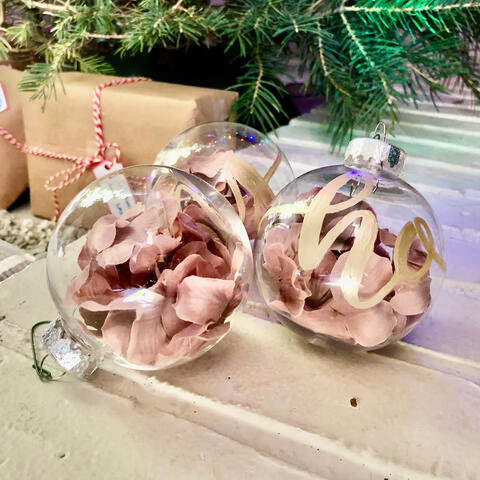
Creating a DIY Floral Ornament: A Personal Touch for Your Holiday Tree
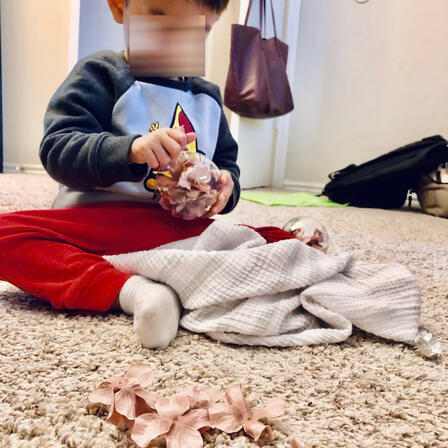
When our family moved to a new city a few years ago, we had to part with many belongings, including our tree and ornaments. With my son just 2 years old at the time, I saw it as a chance to start fresh—collecting and crafting new ornaments to make the season special.
Materials:
Silk flowers - Small ones work best for ornaments. I used Dusty Rose Hydrangeas for my project.
Clear plastic/acrylic fillable ornament ball
Optional: Acrylic paint (antique gold)
Optional: Paint brush
Optional: RIbbon
Steps:
Prepare the Flower: Remove flowers from their stems using scissors or by twisting them off. Trim the flower bases so they lie flat, if needed.
Decorate the Ornament Base: Remove the silver cap and fill the ornament ball with flowers. Replace the cap when done.
Final Touches: Paint lettering using acrylic paint
Optional Final Touches:
Personalize: Add a small name tag or a mini photo to make it a keepsake.
Add lettering: Paint words or names using acrylic paint
Attach a Ribbon: Thread ribbon or twine through the ornament loop at the top. Tie a knot or bow for hanging.
Want to chat or collaborate?
You can always reach out via Instagram or email me directly. I love connecting with fellow makers and moms.
© 2025 Craftology by Nancy. All Rights Reserved. | All content is protected under copyright law.

CRAFTOLOGY BY NANCY
Creative goods for families, kids, and collectors
BeyBladeX Jaxon Costume Tutorial
November 1, 2024
> This page includes affiliate links. If you purchase something through them, I may earn a small commission at no extra cost to you — but I only share products I genuinely use and recommend!
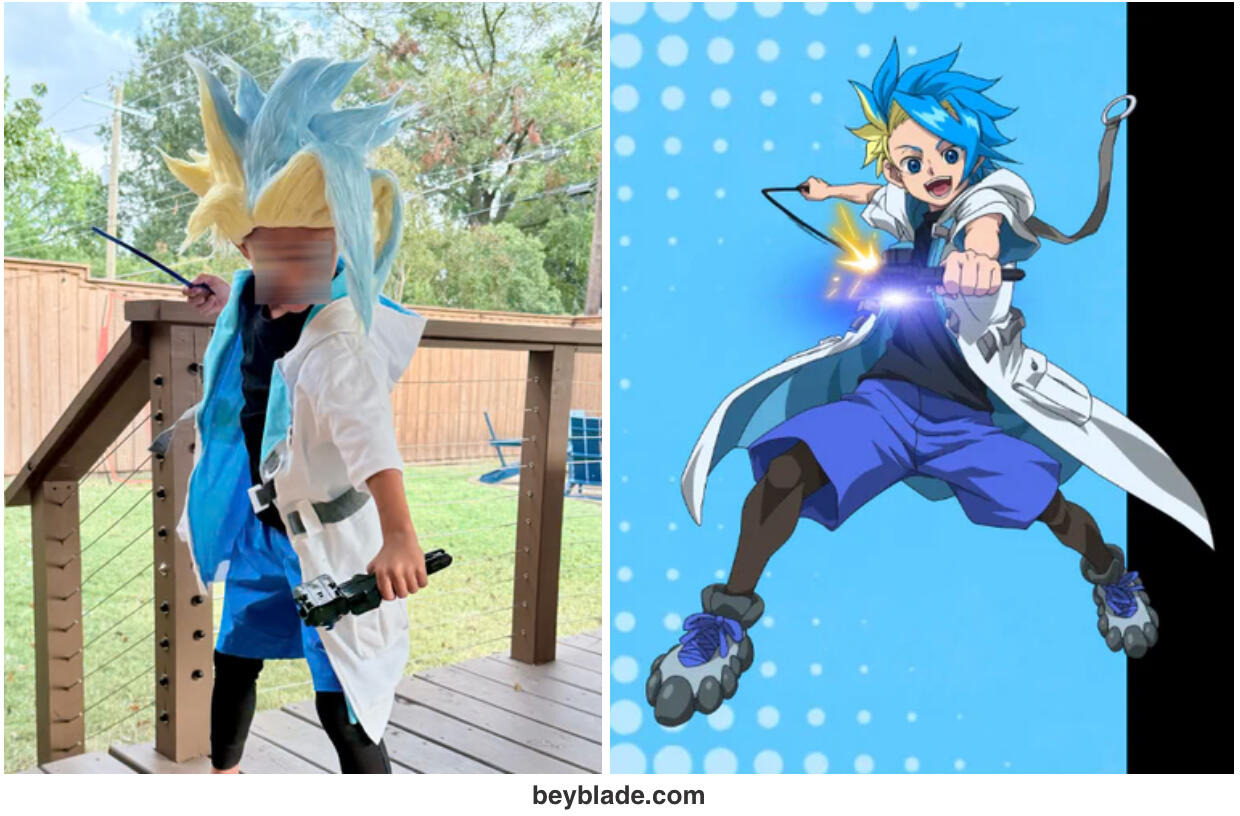
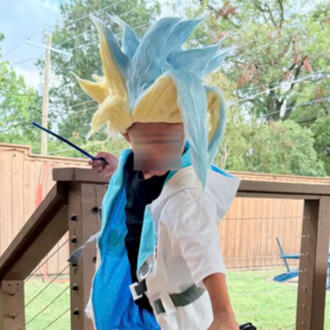
Every Halloween, I challenge myself to learn something new while making costumes for my kids. This year, my son wanted to be Jaxon Cross from the new BeyBlade X series. Thankfully, my previous experience making spiked hair for his Sonic the Hedgehog costume made crafting Jaxon’s signature wig easy.In previous years, I've hand-sewn and hot-glued pieces together. This year, I treated myself to a sewing machine! I even tried out a smaller, portable version for quick hems, but for this project, I needed something sturdy enough for thicker fabrics.
Materials:
White Short-Sleeve Zip-Up Hoodie – 2 (for the outer coat)
Hooded Tank Top (light blue) – 2 (for the coat liner)
Felt Fabric (gray, white) – for wig base, belt, straps, buckles, and hood ring
Faux Fur Fabric (banana yellow, baby blue – for the wig
Baseball Cap – for the wig base
Stuffing - to shape the hair
Glow-in-the-Dark Sealer – This sealer added an extra “wow” factor, making the hair glow!
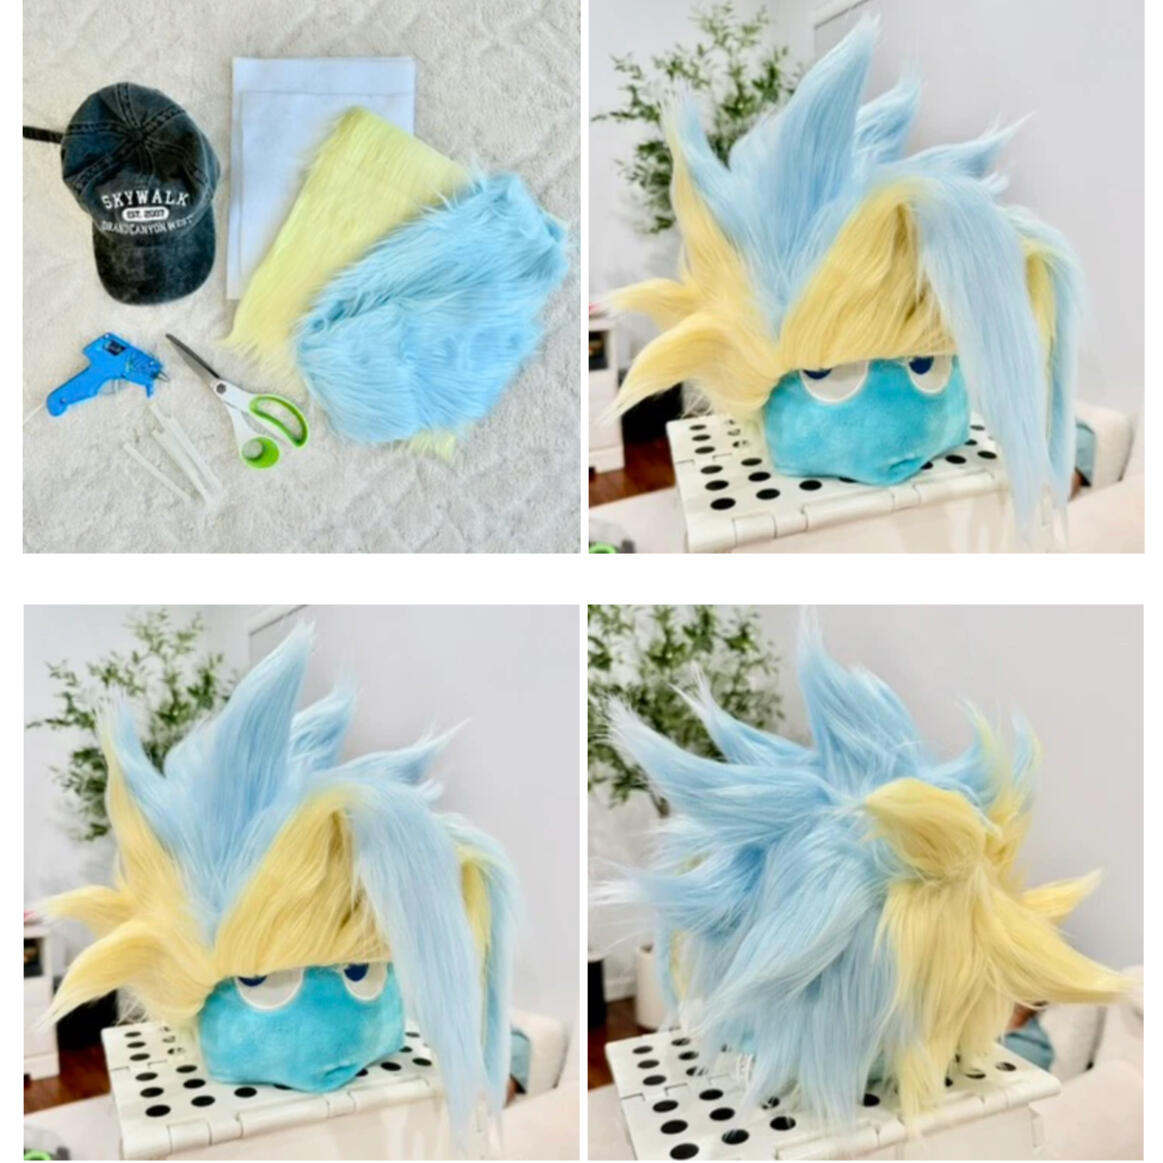
STEPS TO CREATE JAXON’S WIG:
Prep the Cap Base: Remove the brim of an old baseball cap and cover it with white felt.
Build Hair Templates: Use felt to create cone shapes in varying sizes to mimic Jaxon’s spiky hairstyle. These cones serve as the base for your faux fur.
Attach Faux Fur: Cut faux fur (only the fabric base, not the fur strands) and glue it onto the felt cones. This ensures a fluffy, textured look.
Style the Wig: Shape and brush the fur with a comb to achieve Jaxon’s wild spikes.
Add Glow: Seal the wig with a glow-in-the-dark spray for a magical effect. The more layers you apply, the brighter it glows!
STEPS TO MAKE THE HOODED TRENCH COAT:
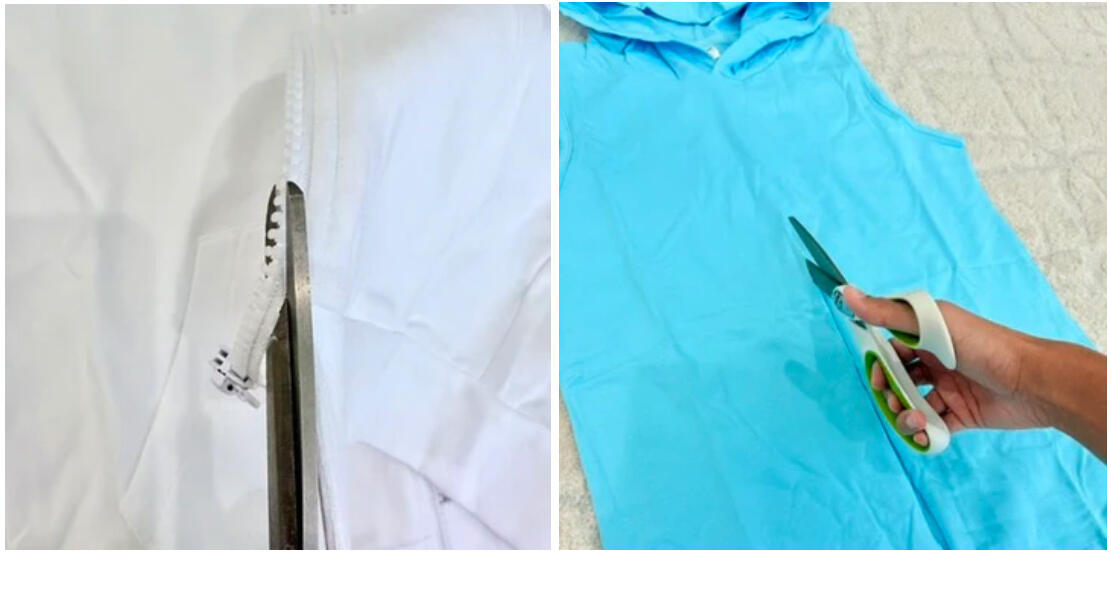
Create the Outer Coat: Trim the bottom half of one zip-up hoodie and combine it with the top portion of the second hoodie to form a long coat. Sew them together.
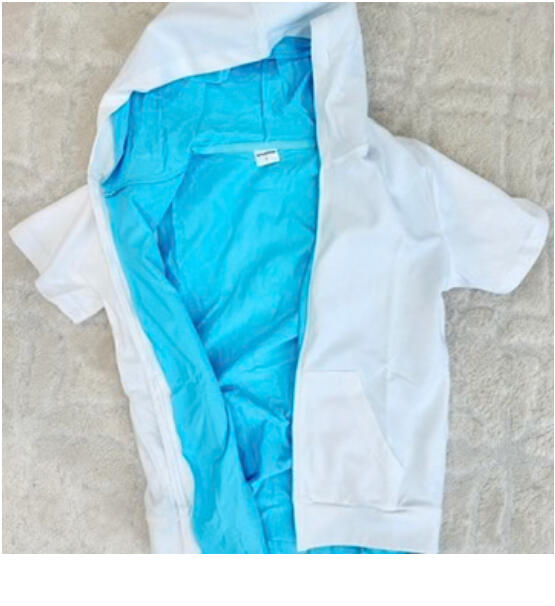
Make the Liner: Cut open one hooded tank top down the middle. Trim off the top of the second tank starting at the armpit, cut open, and sew them together.
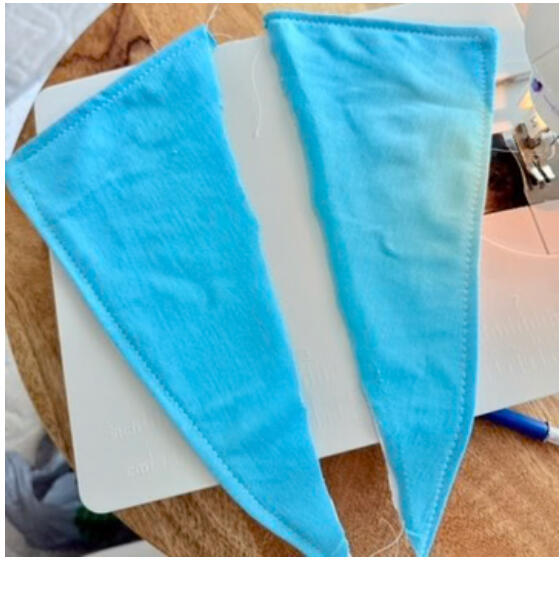
Add Lapels: Use leftover hoodie pieces to cut two white and two blue obtuse triangles. Pair and sew a white and blue triangle together to create one lapel. Repeat for the other side.
Assemble the Coat: Layer the blue liner inside the white outer coat. Pin the lapels between the layers and sew everything together.
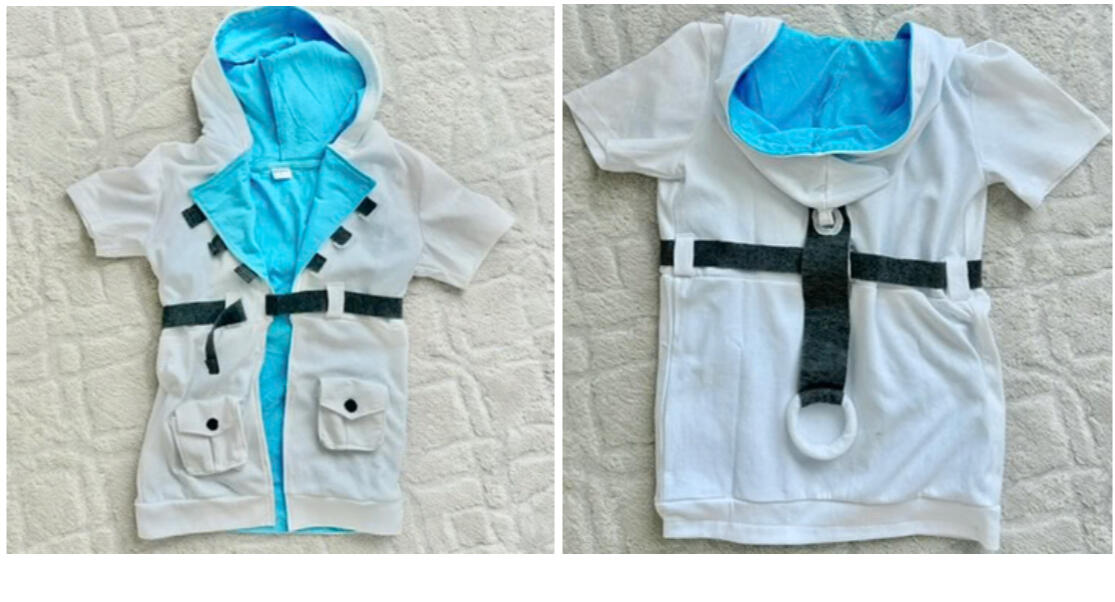
Add Details: Use leftover fabric or felt to create belt loops, a belt, and decorative straps. Attach them with hot glue. Craft a felt strap and ring to hang from Jaxon’s hood for an extra touch of accuracy.
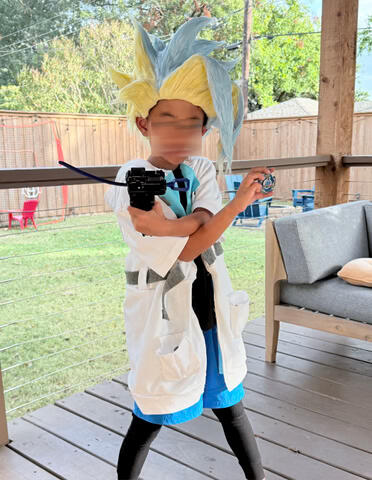
FINAL LOOK
Pair the wig and coat with a black shirt, blue shorts, and black leggings.
This costume is proof that every project builds on the last. With each new skill, I’ve become more confident in tackling ambitious designs. If you’re just starting out, don’t be afraid to experiment—it’s all part of the fun!Have fun creating, and don’t forget to tag me in your progress!
Want to chat or collaborate?
You can always reach out via Instagram or email me directly. I love connecting with fellow makers and moms.
© 2025 Craftology by Nancy. All Rights Reserved. | All content is protected under copyright law.

CRAFTOLOGY BY NANCY
Creative goods for families, kids, and collectors
Ursula, Sea Witch, Costume Tutorial
November 1, 2024
> This page includes affiliate links. If you purchase something through them, I may earn a small commission at no extra cost to you — but I only share products I genuinely use and recommend!
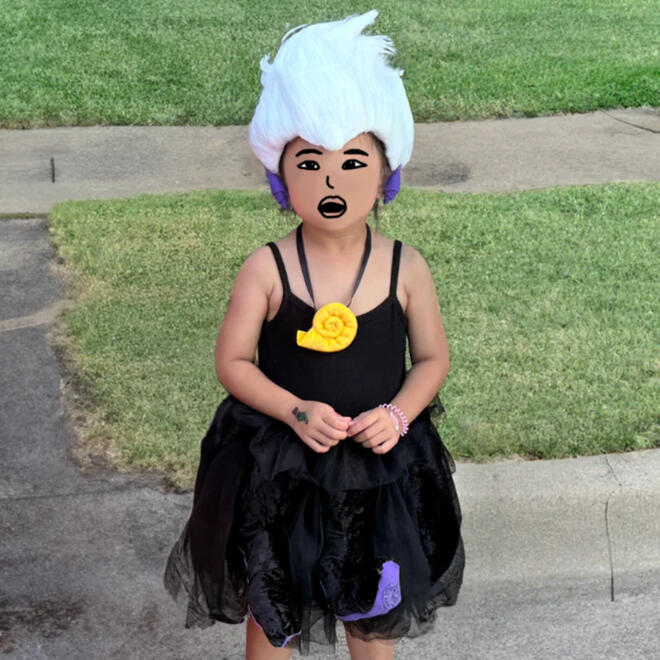
DIY Ursula Costume Tutorial: How I Made My Daughter’s Glow-in-the-Dark Sea Witch Look
When my daughter announced she wanted to be Ursula, the sea witch from The Little Mermaid, I couldn’t have been more excited. This costume was a chance to go all out, and we had so much fun putting it together! Here’s the full tutorial so you can create this striking DIY look at home—complete with glow-in-the-dark details that had my daughter’s friends talking all day!If you’re looking for something unique and memorable this Halloween, this Ursula costume is the way to go. I’ve linked all the materials to make shopping easier!
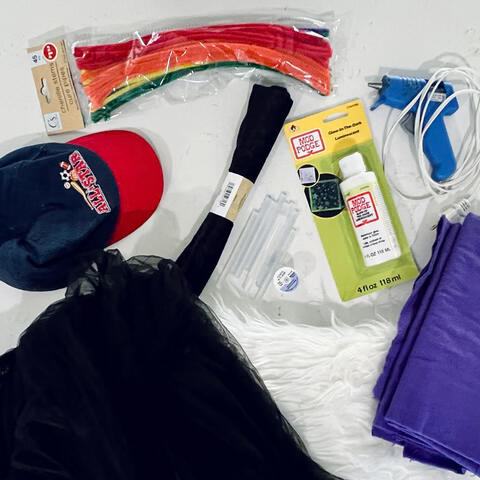
Materials:
White Faux Fur – For that signature Ursula hair.
Baseball Cap – The foundation of the wig, making it easy for little ones to wear.
Glow-in-the-Dark Sealer – This sealer added an extra “wow” factor, making the hair glow!
Black Tulle Dress – Simple, layered, and perfect for that underwater look.
Fabric (black, purple) – For making Ursula’s tentacles. Any material/style. I got mine from my local dollar and craft stores.
Metal Snap Tape – To easily secure the tentacles to the dress.
Pipe Cleaners – For shaping the tentacles, making them bendy but strong. I grabbed these at my local dollar store.
Stuffing – To fill the tentacles and add some volume.
Felt Fabric (white, gold, purple) – Perfect for the wig, seashell necklace, and earrings.
Ribbon or string – Used to make Ursula’s iconic seashell necklace. I had some old material from old projects.
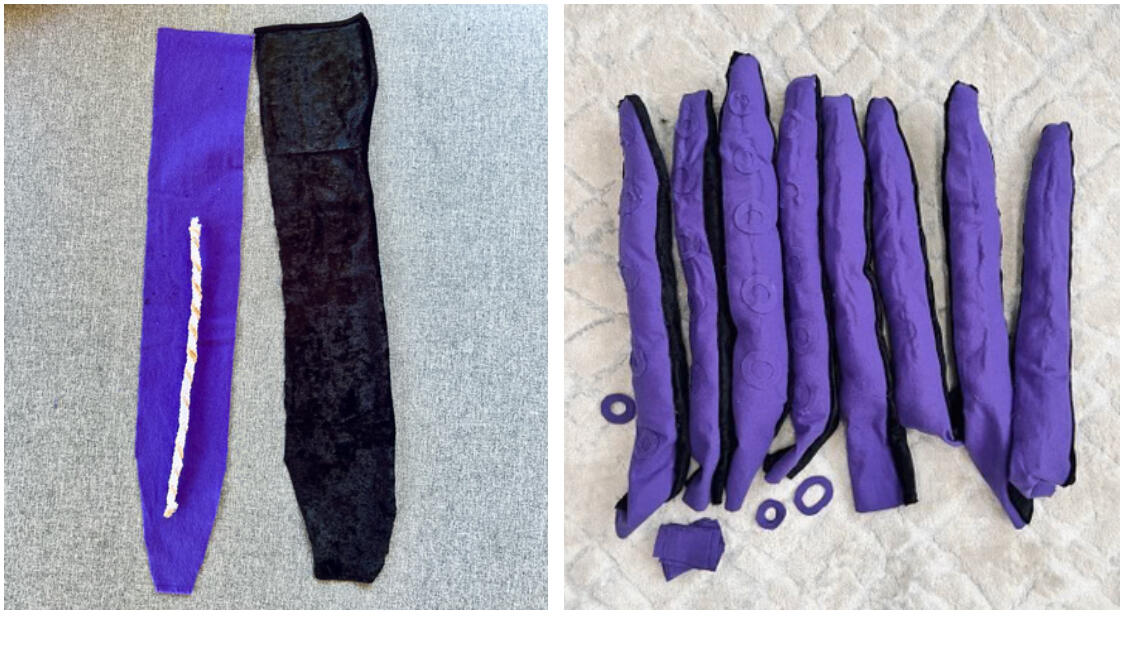

Steps to Create the Tentacles & Dress:
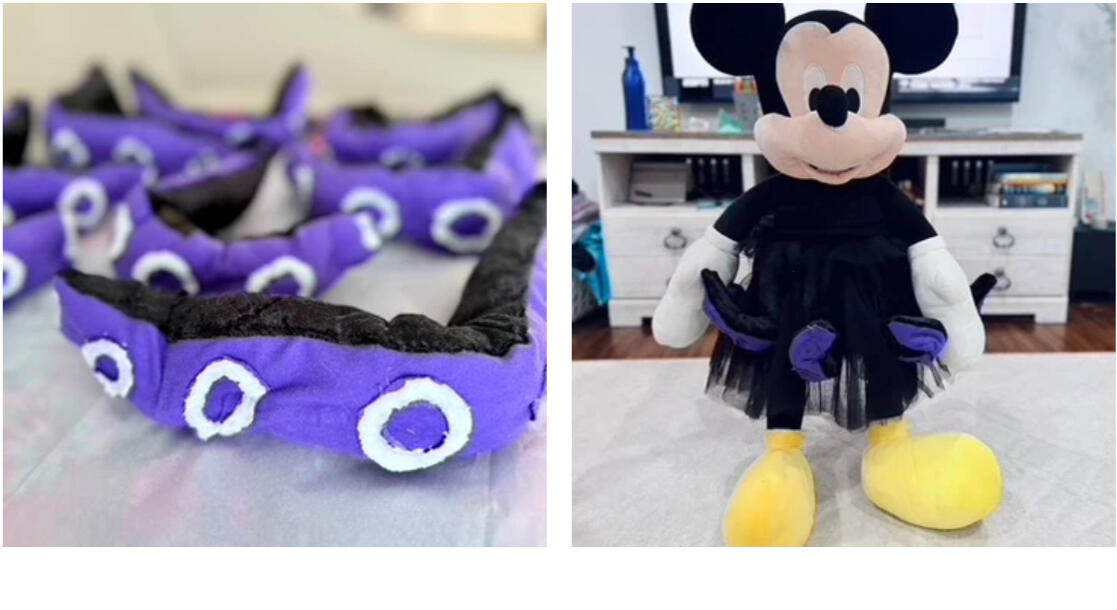
Cut Tentacle Shapes: Start by cutting long, tentacle shapes from both the black and purple fabric.
Sew the Tentacle Edges: Place a black and purple piece together (inside out) and sew or glue along the edges.
Add Pipe Cleaners: Turn the tentacle right-side out, then glue a pipe cleaner down the middle of the purple side to help it bend. If a single pipe cleaner isn’t strong enough, try twisting 4-5 together.
Stuff with Cotton: Lightly fill each tentacle with cotton, being careful not to overstuff (it could make them too heavy to stay bent).
Add Suction Cups: Cut small “O” shapes from purple fabric to create suction cups and glue them along the purple side of each tentacle.
Repeat: Continue making tentacles until you have as many as you’d like—eight is perfect for a classic Ursula look, but you may need less for kids.
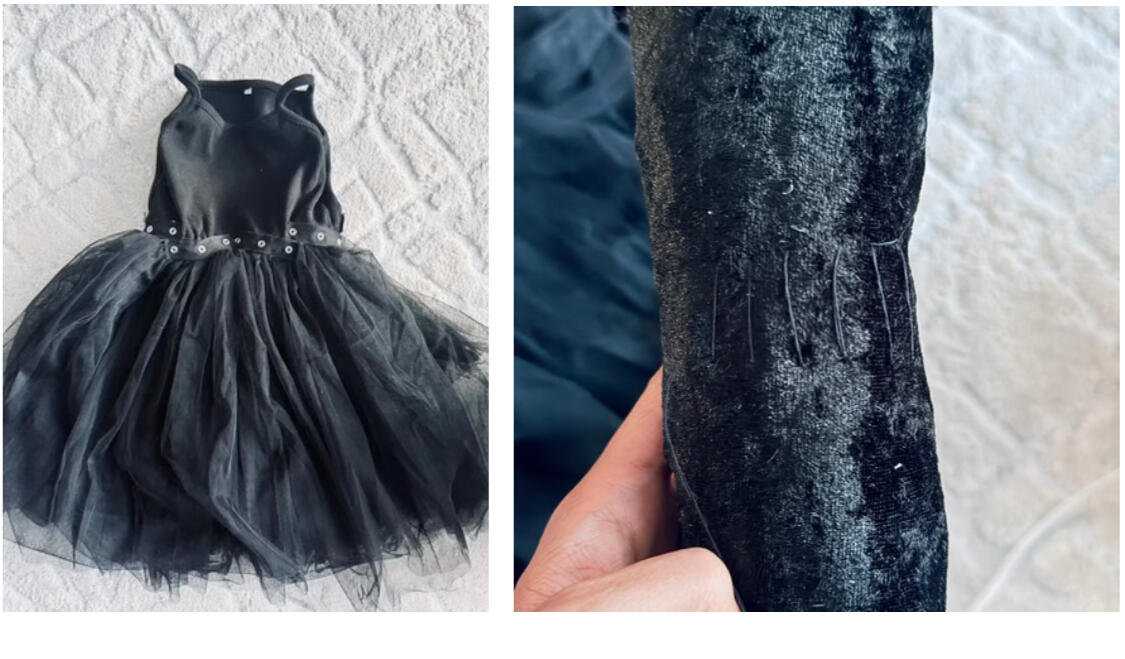
Adjust the Dress: I removed an inner skirt layer and a tulle layer from the dress to make it lighter and more transparent so the tentacles would stand out. My daughter wore black shorts underneath for comfort.
Attach Snap Tape: Sew (or glue) snap tape around the waist of the dress, just above the tulle skirt. You can use one long piece or smaller strips.
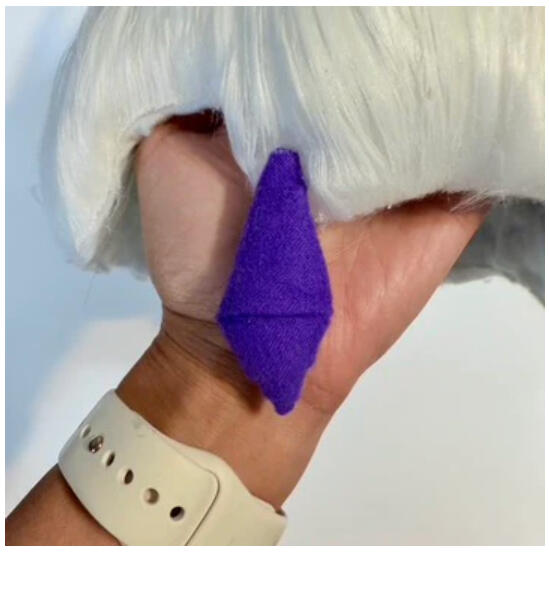
Secure Tentacles: Roll the open ends of each tentacle and attach the opposite side of the snap tape. Tip: Double-check that one side of the snap tape is on the dress and the opposite on each tentacle.
Shape Tentacles: Bend each tentacles so the purple is visible. If neededm you can stitch the black fabrics together to keep the bent (see photo above).
Apply Glow-in-the-Dark Sealer (Optional): Add sealant to the suction cups on the tentacles to make them glow. Tip: Add multiple layers. This product works better on lighter colors.
Add Extra Tulle (Optional): To cover the snap tape, I cut extra tulle into a 2.5 inch wide strip, then sewed it in a ruffled style around the waist.
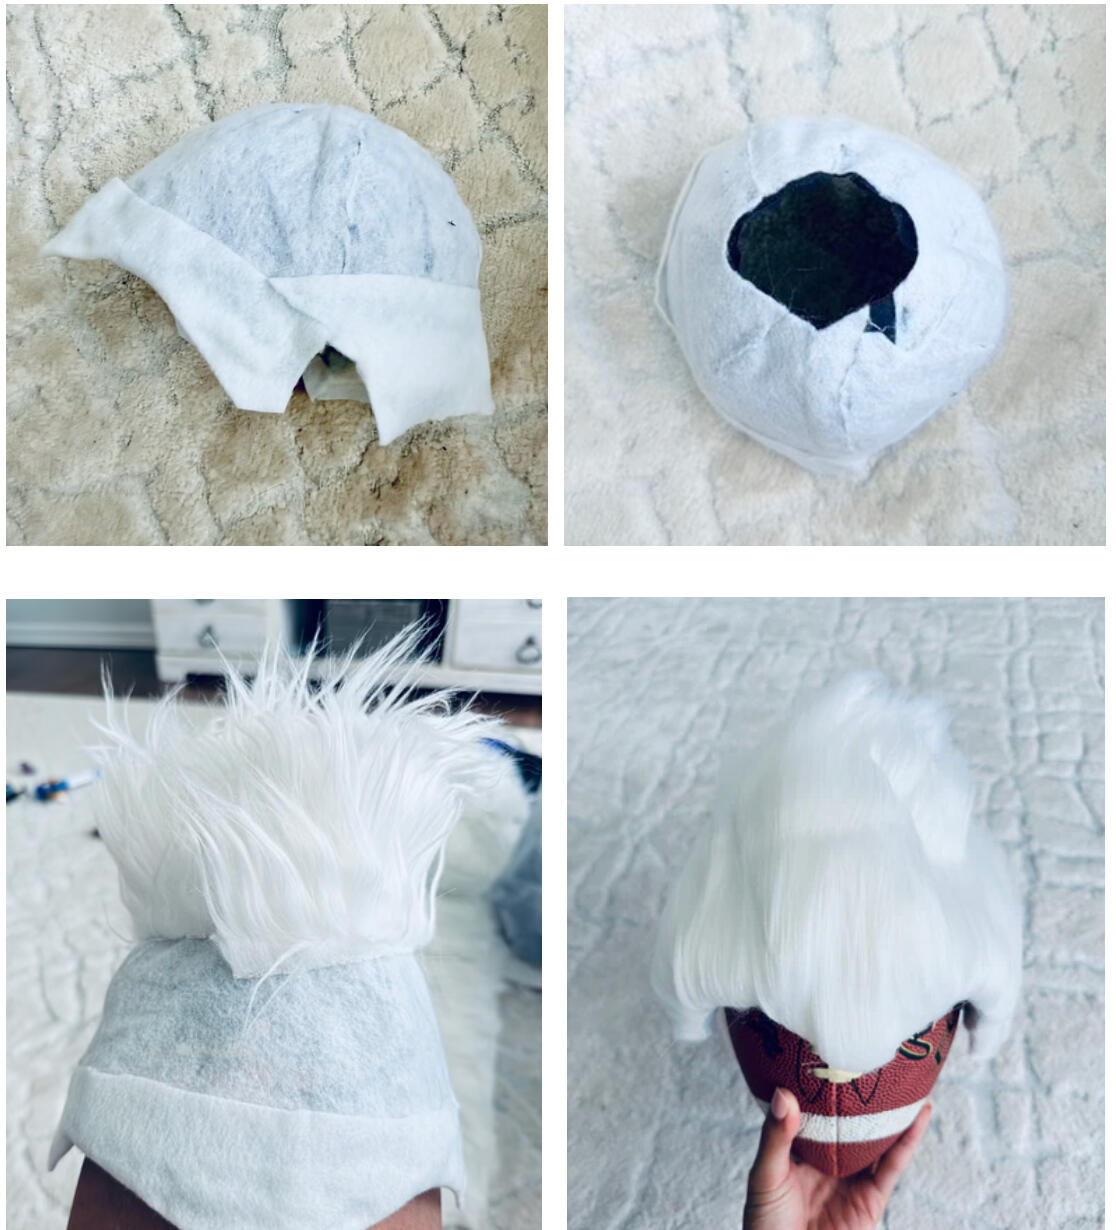
Steps to Create the Wig:
Cover the Cap: Take an old baseball cap and cut off the brim. Then cover it with white felt, adding a widow’s peak and sideburns to mimic Ursula’s look. I also extended the back to cover my daughter's natural hairline. Tip: I cut a hole on top of the cap so I can pull up my daughter's long hair through it, tied into a bun.
Glue Faux Fur for Texture: Carefully glue white faux fur onto the felt in layers. For extra texture, I cut the fur into three wavy strips to create Ursula’s signature “spikes.” Tip: Only cut the base fabric of the fur, not the fur itself, to keep it fluffy. Again, I left an opening on top pull my daughter's hair bun through.
Apply Glow-in-the-Dark Sealer: I used a glow-in-the-dark sealer to keep the hair in place and add a magical glow. Tip: The more you add, the better it glows!
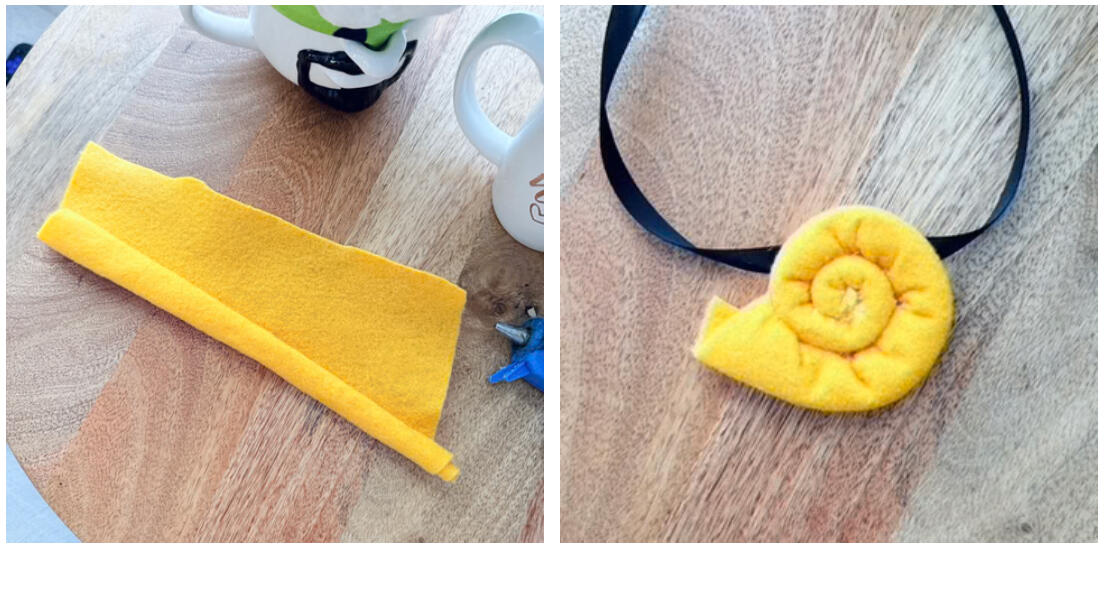
Steps to Create the Wig:
Make the Earrings: Cut two strips of purple felt, roll each one like a croissant, and glue them to the sideburns of the wig.
Create the Seashell Necklace: Roll a 4x6 inch piece of gold felt at a slight angle on the longer side and secure with glue. Once dried, roll it again into a spiral (like a cinnamon roll) and secure it as you go. Attach a ribbon or string to the back of the shell to complete the necklace.
FINAL LOOK
And that’s it! My daughter was thrilled with her costume, and the glow-in-the-dark wig was an instant hit. Friends loved it and talked about it all day at school! If you’re looking to make a memorable costume for your child, this DIY Ursula Sea Witch look is totally worth it.
I hope this tutorial helps you create an unforgettable Halloween costume! You can find links to all the materials we used, making it easier to get everything in one go. Happy Halloween crafting!
Want to chat or collaborate?
You can always reach out via Instagram or email me directly. I love connecting with fellow makers and moms.
© 2025 Craftology by Nancy. All Rights Reserved. | All content is protected under copyright law.

CRAFTOLOGY BY NANCY
Creative goods for families, kids, and collectors
Witch Costume
October 23, 2024
> This page includes affiliate links. If you purchase something through them, I may earn a small commission at no extra cost to you — but I only share products I genuinely use and recommend!
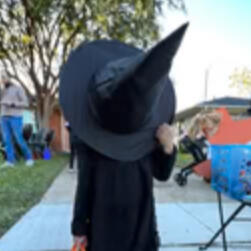
DIY WITCH COSTUME TUTORIAL: HOW I CREATED A MAGICAL LOOK FOR MY DAUGHTER (WITHOUT BREAKING THE BANK!)
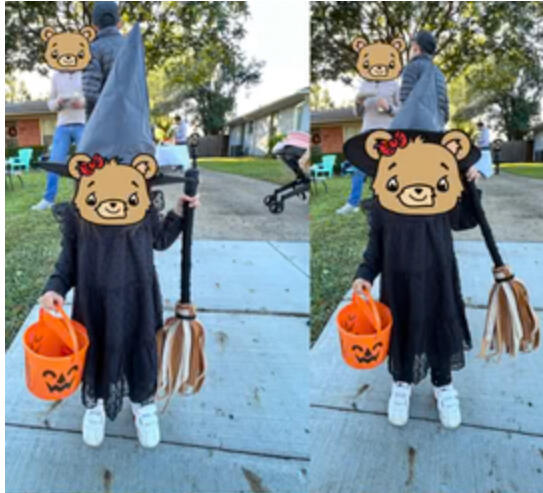
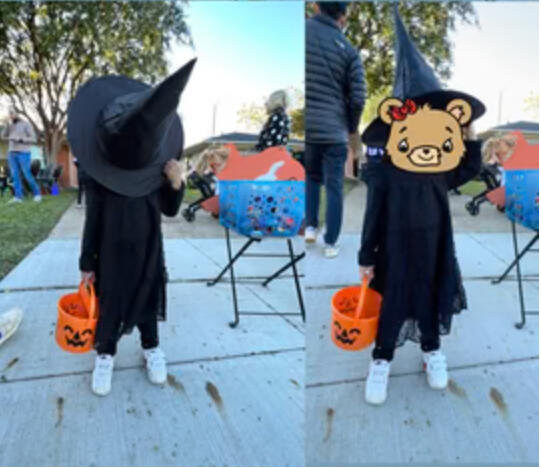
Last Halloween, my 2-year-old daughter decided she wanted to be a witch. I was already juggling the details of my son’s costume and, honestly, whipped up something quick for her. Unfair, I know, but I promised myself I’d make it up to her this year. So here we are—with a full-blown DIY witch costume that turned out way better than I expected, and I even found some budget-friendly pieces along the way!If you're a busy parent like me, this tutorial is perfect because it’s simple, inexpensive, and will make your little one feel magical. Plus, I’ve linked all the affordable and easy-to-find materials to make it even easier.
Materials:
Black Dress – I wanted something comfy and cute, so I found this perfect black dress that’s breathable and great for layering!
Black Leggings – Since it was a bit chilly, I added some cozy black leggings to keep her warm.
Witch Hat – No witch is complete without a hat! I found a pack of two cute witch hats, which I considered sharing for a matching look, but ultimately saved the second for next year.
DIY Broomstick – I used an old golf toy for this, but you can easily substitute with a dowel rod. Here's a similar toy golf set if you’re feeling resourceful like me! We already had these at home.
Felt Fabric (Black, Brown, and Light Brown) – Felt is my go-to because it’s easy to cut and shape.
Masking Tape – Used to secure the broomstick without damaging the toy.
Hot Glue Gun – For holding everything together (literally!).
Optional: Twinkle Lights – We had some leftover lights from a party favor, and they added the cutest touch to the broom.
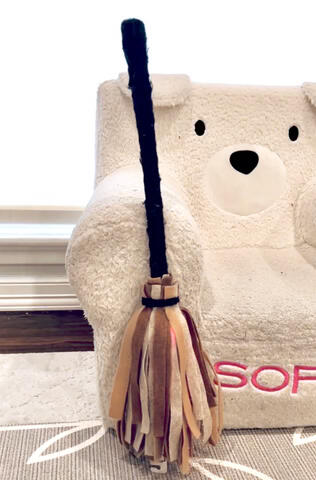
Steps to Create the Broom:
Cut the felt fabric into 1-inch strips. The black strips are for the staff of the broom and the brown strips will be the "bristles" of the broom.
Wrap the golf staff with masking tape to protect it. You can skip this step if you’re using something you don’t mind gluing on directly.
Wrap black felt around the staff and secure it with hot glue. Tip: Don’t just glue the ends like I did at first—this didn’t hold well! Apply glue along the strips or the entire length of the staff as you wrap them to keep everything snug.
Attach the bristles: Glue the brown and light brown strips around one end of the staff, alternating the colors. I layered about three times to give it a fuller, thicker look.
Tie a black felt strip around the base of the bristles to secure them.
Optional Twinkle Lights: For some added magic, I tucked a strand of twinkle lights into the broom. This little touch made her feel like she had a glowing broomstick!
And voila! A quick and easy broomstick to go with the rest of her costume. Pair it with the black dress and witch hat to complete the look. This DIY was such a hit that I’m already planning to go all out again next year!
Want to chat or collaborate?
You can always reach out via Instagram or email me directly. I love connecting with fellow makers and moms.
© 2025 Craftology by Nancy. All Rights Reserved. | All content is protected under copyright law.

CRAFTOLOGY BY NANCY
Creative goods for families, kids, and collectors
Making Batch Custom Shirts Using Glitter HTV
July 17, 2024
> This page includes affiliate links. If you purchase something through them, I may earn a small commission at no extra cost to you — but I only share products I genuinely use and recommend!
Tried no-mat cutting for the first time… and I have thoughts.
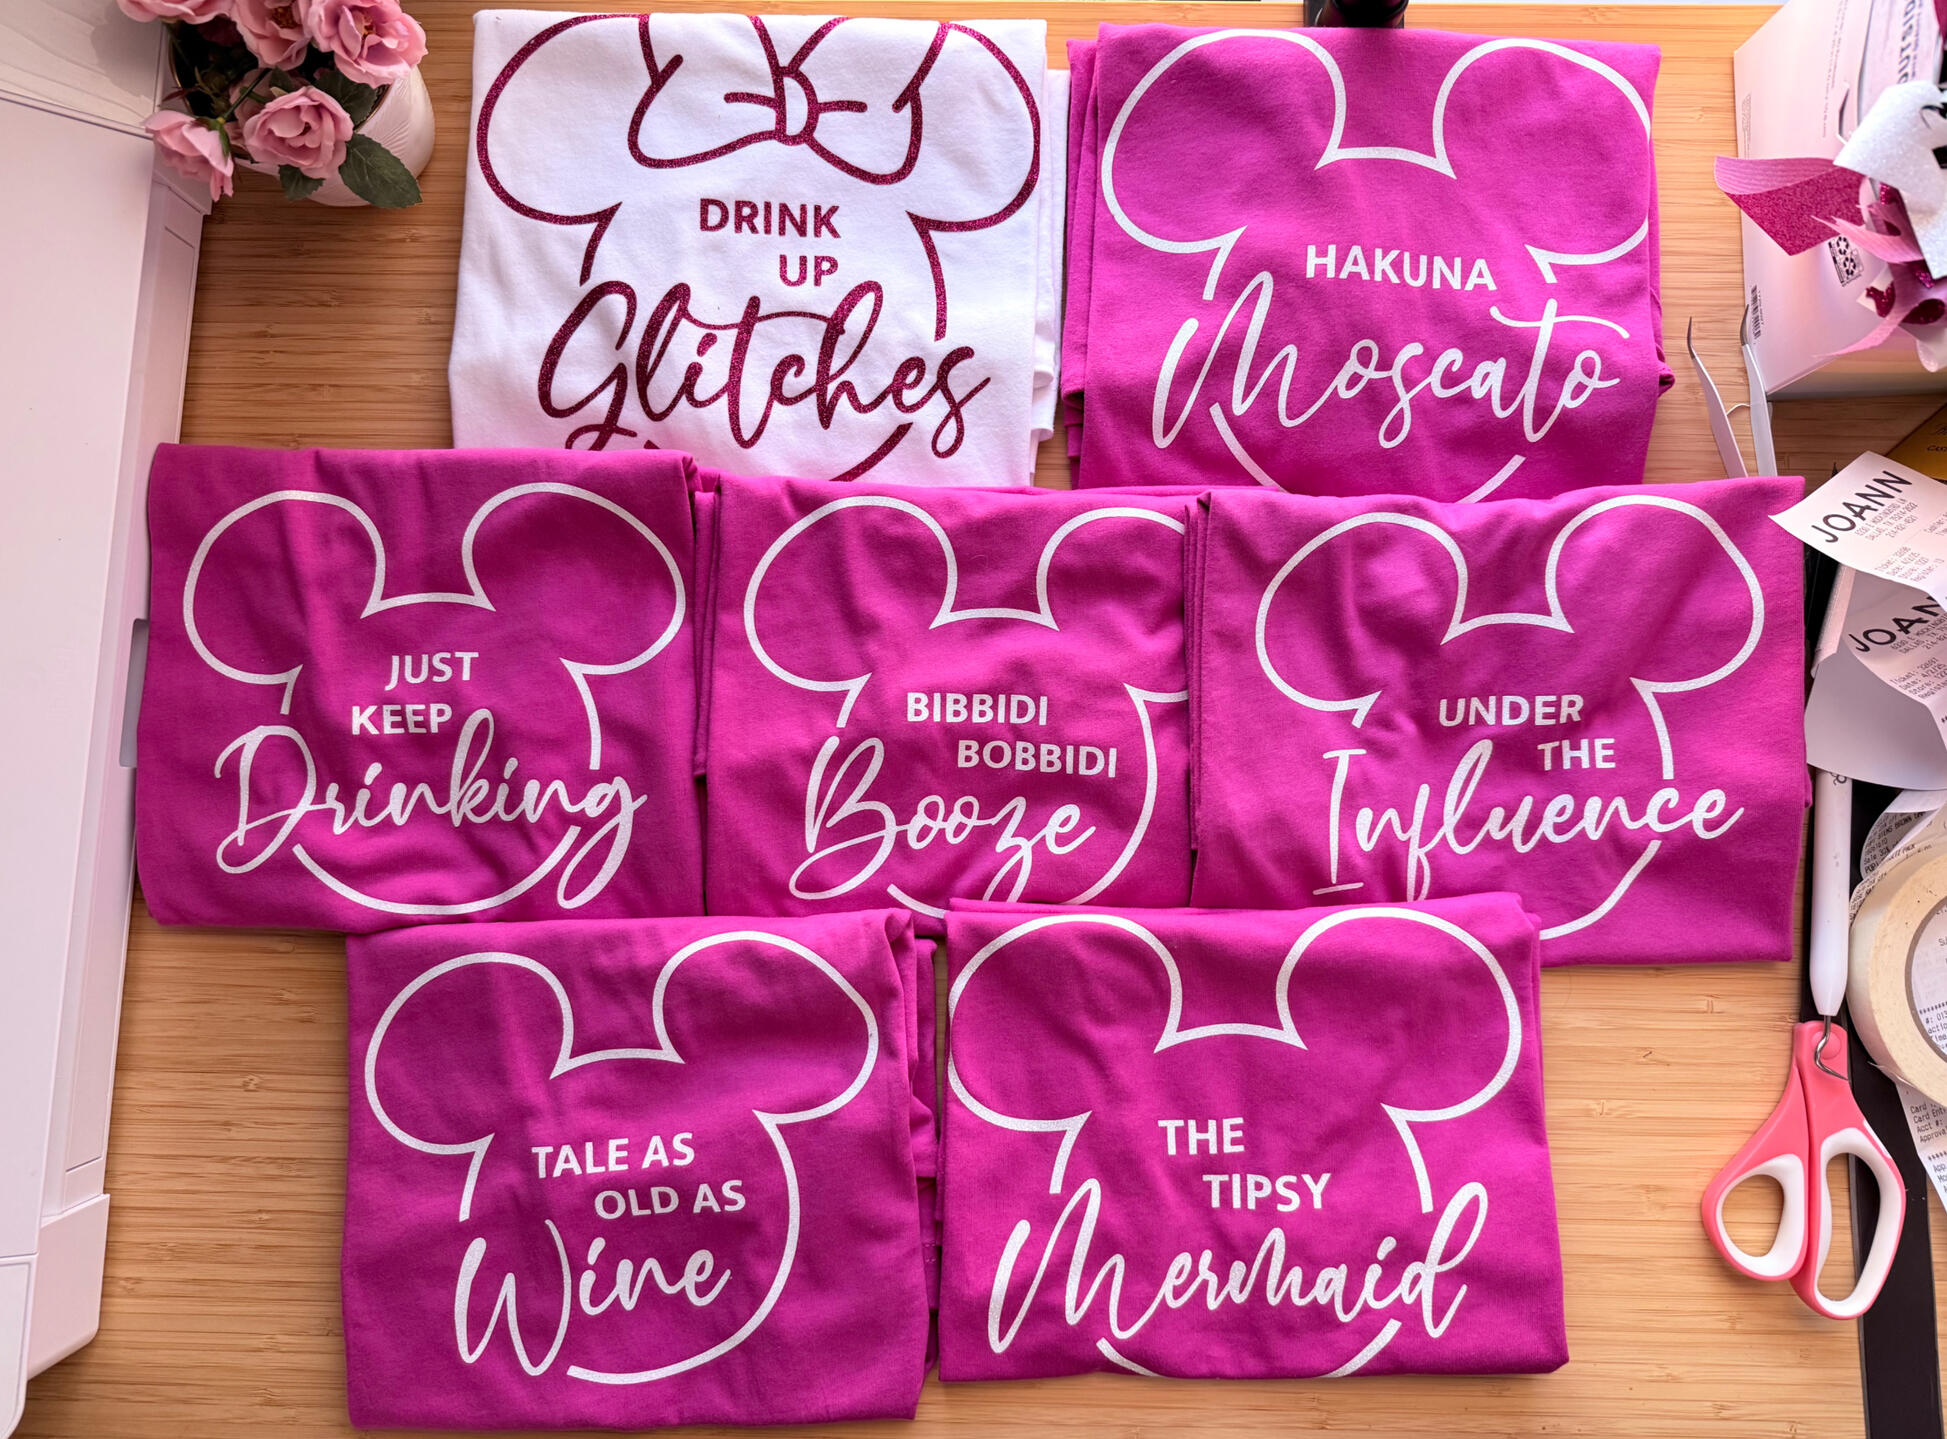
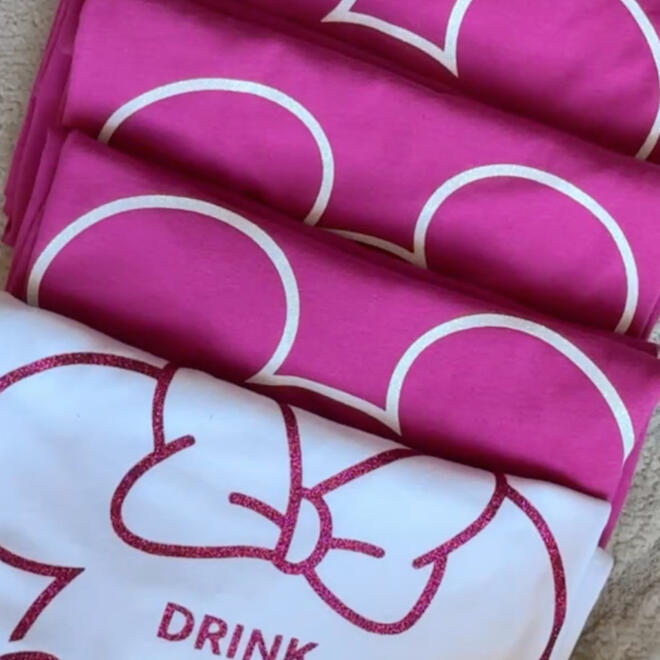
So I finally gave in and tried cutting without a mat on my Silhouette Cameo 4 for the first time… and honestly, I have mixed feelings 😅It felt weird feeding vinyl straight into the machine with no mat—like I was breaking a rule or something. 😂 But for this larger design, it actually worked pretty smoothly.The cut was clean, the glitter HTV weeded beautifully, and the press turned out great!Still deciding if I’d go matless again, but it definitely saved some time on setup for a project this size.And yes, this glittery HTV is that good. It is so pretty! One thing to note is the white glittery HTV was much more easier to weed than the hot pink one. You can see this in the video when I made personalized bandanas.
Materials:
Glitter HTV (hot pink) – DISCLAIMER: I ordered from this particular link because I wanted a small quantity. The product was horrible. The vinyl did not stick to the plastic properly so cutting it was a nightmare. I am linking this product to let you know NOT to buy this exact product. Then again, I may have gotten a bad batch.
Scissors
Weeding Tool – These make removing the extra vinyl super easy
Teflon Sheet or Parchment Paper – To protect your design while pressing
Steps:
Choose Your Design. I illustrated my designs on Procreate and edited the text in Adobe Photoshop.
Mirror Your Image. Before cutting, make sure to flip your design horizontally (mirror it)! Glitter HTV must be cut in reverse because it’s applied face down onto the shirt.
Load Your Vinyl. I used my Silhouette Cameo 4 without a mat for the first time—it made large designs a breeze. Load the glitter side face down, with the shiny carrier sheet on the bottom.
Cut the Design. Select the proper material settings for glitter vinyl (on Silhouette, I used: blade 4, force 33, speed 5—but test first!). Hit “Send” and watch the magic happen.
Weed the Design. Use your weeding tools to peel away the excess vinyl, leaving only the parts you want transferred on the shirt. This part is so satisfying!
Pre-Press Your Shirt. Before applying your design, press the shirt for a few seconds to remove moisture and wrinkles.
Press the Vinyl. Position your design on the shirt (glitter side up, carrier sheet on top). I always refer to this guide to help me.
Peel the Carrier Sheet. Let the shirt cool slightly, then peel the clear carrier sheet off. For glitter HTV, it’s usually a warm peel—check your vinyl instructions to be sure.
Final Press (Optional). Place a Teflon sheet or parchment paper over the design and do one final press for 5 seconds to seal everything in.
TIPS:
Always do a test cut!
Use high-quality cotton shirts for the best adhesion.
Layer glitter HTV only if the brand says it’s safe—some don’t stick well on top of each other.
Wash shirts inside-out and hang dry for long-lasting sparkle.
Want to chat or collaborate?
You can always reach out via Instagram or email me directly. I love connecting with fellow makers and moms.
© 2025 Craftology by Nancy. All Rights Reserved. | All content is protected under copyright law.

CRAFTOLOGY BY NANCY
Creative goods for families, kids, and collectors
Want to chat or collaborate?
You can always reach out via Instagram or email me directly. I love connecting with fellow makers and moms.
© 2025 Craftology by Nancy. All Rights Reserved. | All content is protected under copyright law.